Well if you’ve seen the movie Interstellar, or if you studied any astrophysics at all, you’ll know that black holes look weird because of their huge mass and gravity. The effect could be partly explained just using Newton’s law of gravity, by assuming the mass-energy equivalence as discovered by Einstein (E=mc2, i.e. by assuming the photons are attracted by the gravity), but the correct observed value can only be obtained by the results of Einstein’s general relativity, accounting for the curvature of space-time around the mass.
Unfortunately though, evaluating the full integral to find the true path of the ray for each pixel seems like it would be computationally prohibitive (i.e. it would need a lot of computing time). So as always in real-time computer graphics, an approximation needs to be made.
A fast, accurate approximation is already made for the gravitational lens for relatively small deflection angles, as a result of finding the limits of the integral. Thanks to Einstein, the deflection angle is approximated as (image from wikipedia) :

where G is the gravitational constant, M is the mass of the object (black hole in this case), c is the speed of light and b is the impact parameter, or the perpendicular distance to the center of the black hole from the viewing ray. Interestingly, this equation was first shown to be correct by Arthur Eddington and Frank Dyson in 1919 during a solar eclipse by observing stars appearing very near the Sun, and measuring how much their light had been deflected by the Sun’s mass, thus providing evidence to support Einstein’s general relativity.
To draw the image of the gravitational lens, really just a skybox texture is required. Since Galaxia already renders the skybox for star systems, this is reused here. However, although a star system is quite small compared to the distance to nearby stars, the closest stars might appear to be in the wrong locations when drawn in the skybox since it is static over the entire star system. To counter this effect, usually Galaxia does not render nearby stars into the skybox, but instead renders them as normal objects afterwards. This would mean that some stars might appear to be missing in the gravitational lens, so for the black hole systems the engine must render all the stars into the skybox. This unfortunately does reintroduce the star position “popping” effect as the skybox transitions to the full rendering of the stars, when entering or leaving the system. But these are unfortunately the sorts of prices we pay for real-time rendering on consumer hardware. The solution might be to render a separate skybox for the gravitational lens, but this would require a lot more graphics memory. For the moment at least, I’ll put up with the popping effect. It’s not really that noticeable anyway if you’re not paying close attention.
With the skybox texture in place, some geometry needs to be rendered to generate some pixels. The same as some other volumetric effects I’ve been working on, I start with an inverted cube, which is 100 times the Schwarzchild radius (in the case of a black hole, the Schwarzchild radius is the proper radius of the event horizon, or “shadow”). It is also worth noting that the Schwarzchild radius equation is closely related to the gravitational lens equation (image from wikipedia):

So, if the black hole’s Schwarzchild radius is calculated as part of the procedural generation system, the deflection of each pixel’s ray can be easily calculated as 2*rs/b:
float rs = SchwarzchildRadius; //constant for the shader. depends on the mass
float3 p = BlackHolePosition; //relative to the camera. constant for the shader
float3 rd = normalize(input.Direction); //ray direction for the pixel.
float b = PointRayDist(p, rd); //impact parameter.
float a = 2 * rs / b; //deflection angle - thanks Albert!
Where b is the impact parameter, calculated using the point-ray distance function:
float PointRayDist(float3 p, float3 rd)
{
   return length(cross(rd, p));
}
Where p is the position of the black hole relative to the camera, and rd is the ray direction. Note that this function assumes that the ray passes through the origin.
I also subtract a small constant value from the calculated deflection angle so that the edges of the lens can blend smoothly with the existing background skybox. The deflection would actually be visible out to many hundreds or even thousands of times the Schwarzchild radius, but for real-time rendering purposes this is not really practical. I had chosen the rendered inverted cube size to be 100 times the Schwarzchild radius to try and keep the result as close to reality as practical. The small offset constant was chosen to work well with that size cube (in case you’re wondering, the value I use is 0.02).
Now that the deflection angle is known, the deflected ray direction can be calculated. I have done this by using a quaternion:
float3 bhdir = normalize(p); //the direction to the center of the black hole
float3 axis = normalize(cross(rd, bhdir)); //the axis of deflection
float4 qdef = qaxang(axis, a); //quaternion representing the deflection
float3 ddir = mulvq(rd, qdef); //apply the rotation to the original ray dir
(See my galaxy rendering post for the definitions of qaxang and mulvq functions)
The deflected direction vector is then used to sample the skybox as normal.
This still won’t produce an image of a black hole though, just a gravitational lens approximation. To get the shadow to appear, a simple solution is to choose a maximum deflection value, and output black for any angle higher than that. On comparison with the actual Schwarzchild radius, I found that a maximum deflection angle of pi/2 (90 degrees) comes close to being correct, while preserving some of the stronger distortions. To reduce aliasing along the shadow’s edge, I blend the black shadow depending on the deflection angle as it approaches the limit. While not strictly realistic, it’s a sacrifice made in the name of image quality.
Even though this is a very cheap and quite inaccurate approximation for a black hole’s gravitational lens and shadow, the results are fairly convincing – showing the distinct Einstein ring effect, and the upward curvature of the shadow as the camera passes the event horizon, resulting in the “engulfment” effect:
Some special considerations need to be taken into account when looking out from within the event horizon. Since the full field of view is compressed into a tiny point, the intensity of light is magnified, so I multiply the colour output by an arbitrary factor based on the deflection angle to provide this aesthetic effect. This works well since I am using floating-point render targets and HDR post processing.
Most good black holes apparently have accretion discs around them, so this can’t be overlooked. Neutron stars will often have them too, as well as the visible gravitational lens due to their incredible density, so I should be able to re-use the technique again later.
Since I’m already doing lensing calculations in this shader, I thought it would be simplest just to add the sampling of an accretion disc texture based off the same deflection calculations. The first step with this approach is to generate a texture. I wanted the accretion disc to be able to spin, and to have the inner areas appearing to be spinning faster than the outer ones. Unfortunately the standard sort of Perlin noise can’t really do this – if we sample Perlin noise with increasing rotation in some domain warping (think of “twisting” the noise), the noise function will “wind up” over time, to a point where the noise would end up just looking like a set of concentric circles.
Taking a similar approach to the dust clouds in the version 2 of my galaxy rendering, my “spinning noise” works by randomly positioning a series of circles within a known range and summing each one’s contribution depending on its distance from the sample point. From this point of view, it is a variant of cell noise (aka Worley noise). The major difference is however that the grouping of the circles is performed in polar coordinates. This is perhaps best explained with an image:
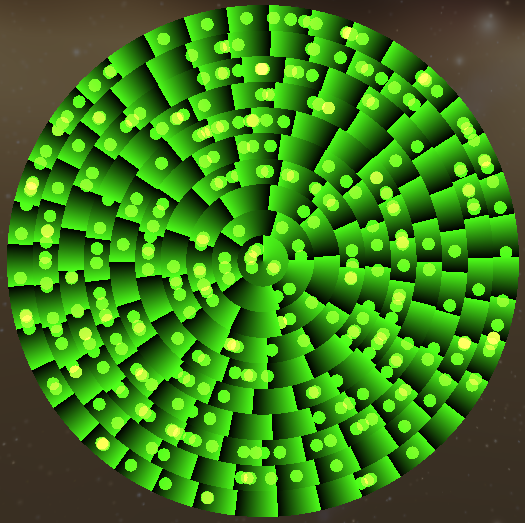
Each concentric ring is divided into segments depending on the radius, to get approximately equal-sized segments. In each segment, n data points are randomly positioned. The concentric rings are then made to rotate at varying speeds, with the inner rings spinning faster. The main advantage of this method is that for each pixel in the final image, only 4 segments need to be sampled, regardless of how many concentric rings or segments there are. For any given pixel, the polar coordinates and therefore the corresponding ring and segment are easily calculated. If we assume the circles can overlap the ring and segment borders only in one direction, only the current cell and the 3 others providing a possible overlap are the cells that need to be sampled for each pixel.
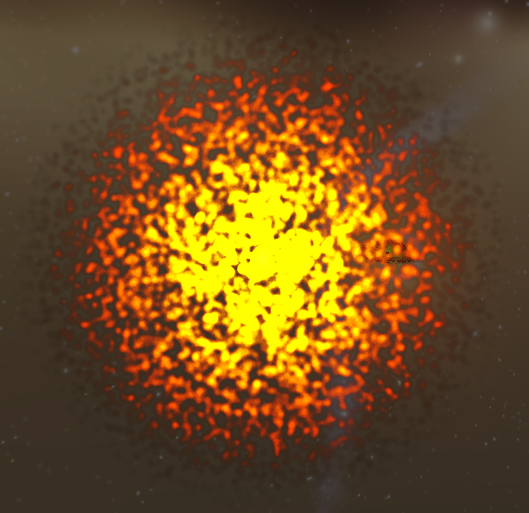
Here’s the animated final effect – if you look hard enough you will be able to just notice the concentric rings pattern. But don’t stare at it too long or too closely because when you look away from it everything will look like it’s spinning!! Don’t say I didn’t warn you!
As mesmerising as it is to watch, it doesn’t look much like an accretion disc yet. But with some tweaks to the density and opacity of circles produced based on the radius, some adjustment of the segmenting parameters and some basic colouring, I ended up with this:
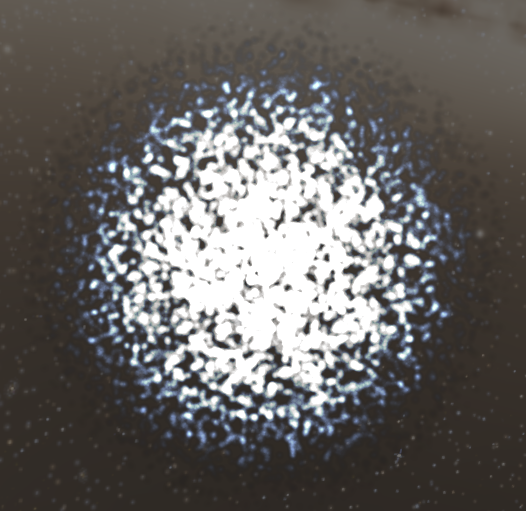
Which is a bit more accretion disc-like. Still not perfect obviously, but I can always spend more time improving it later!
Now comes the most difficult part – calculating where on the accretion disc any given ray might hit. I do this in two parts – first find any hits behind the event horizon’s shadow, rendering those before the black shadow itself, and secondly add any contribution from a hit in front of the shadow.

Hopefully the diagram explains clearly what is going on in this implementation, and makes clear why this is such a wild approximation. It should be obvious for starters that the photon would take a curved path rather than the angled one in the diagram. So if I feel the need to improve on this rendering, I now know that I should start with some hyperbolae. 😀
Regarding the overall effect, this article seems to do a good job of explaining what the Interstellar movie got wrong, and what the black hole and accretion disc should actually look like. Most notable are the red/blue Doppler shifting effects due to the rotation of the accretion disc, and the black hole itself. I do plan on implementing the red/blue shift for the accretion discs, but I need to do some more maths for that first. But for now, I’m fairly satisfied with the result.


Pretty good job!
I used to play SpaceEngine, but you implemented a pretty different stuff, which is undoubtly incredible. I believe this thing will shock space fans around the world. And also, I want to ask you some questions about the current version (R09):
1. As the capacity of binary is so small, are galaxy models generated procedurally?
2. Do you plan to open source this? I noticed that you have post some source codes on this site.
Thanks!
LikeLike
Thanks! 🙂 To answer your questions, everything is 100% procedurally generated, which is why the download is so small. So yes, the galaxies are completely procedurally generated. I’m still undecided about open-sourcing the whole program, because at the current stage I think it would be difficult to manage merging the contributions. Perhaps when the codebase becomes more stable I will consider it, but until then I will try and post relevant code snippets on this site.
LikeLike
AHA!
I’ve been working for some time now on a black hole shader of my own ( http://imgur.com/a/NCEdI ), but I haven’t been able to figure out a way to include an accretion disk aside from faking it with some particle sprites, and poring over the code people have shared on ShaderToy wasn’t getting me anywhere. That diagram and explanation of finding where passing rays will intersect with the disk plane makes so much sense!
LikeLike
You could add alpha based on pixel value on the accretion disc, so that the outer edge is a little transparent.
LikeLike
Hi! Great work on the blackholes. I tried to recreate something like this in Unreal Engine 4, but I always got bad results. Can you give me some tips about where to start and the workflow to create a gravitational lensing effect for a black hole? Thanks!
LikeLike